
Well hello there gorgeous!
After my last post, I am back here with a collaboration together with
my fellow beauty bloggers *love*
The theme is: DRAG QUEEN
Oh Dear! Where do I begin?
My favorite drag queen is....
Alyssa Edwards!
(youtube her, you will know who i am talking about)
Yes, I am a big fan of Ru Paul's Drag race,
so when i am opened to this theme of collaboration,
I quickly said YES!
I personally am amazed with drag queens, I love their makeup and personality!
So glam and fierce *rawwrrrr*
Alrighty, let me introduce my lovely fellow beauty bloggers who are in this collab with moi:

*please click on their name to see their creation*
Moving on!
Here is my take to be a drag queen, I however, did some editing to remove my real eyebrows, I tried to cover my eyebrows with a lot of ways but yeah, they were still showing and also, I add some fake nails haha but as for the makeup, it is done from the scratch by me.
Please excuse the hair, as I dont have a wig to go with it.
*take this as, a drag queen getting ready before a show haha*
My drag queen name is BELLADONNA.
Why?
I dont know I found the name is feminine yet killing?
It is based from a flower so I decided to apply the colors from the flowers onto this makeup.


Now, if you are curious on how I do this makeup *well if you are curious*
scroll down, I have a quick tutorial ;)
STEP 1.
Of course the first thing you want to do is to apply foundation and to cover your eyebrows.
Drag queens tend to have no eyebrows because they prefer to reshape it on a higher arch.
But i cant shave off all of my eyebrows can I? :P i can but i dont want to.
Once the eyebrow are "gone", recreate the eyebrow above the real one.
The higher arch the better it is but in this case, yes i didnt put as high as it should.
In this picture, you can see that my real eyebrow are still peeking,
i tried covering it with different technique and i gave up, I decided just to edit the brow part out slightly.

STEP 2.
Apply a purple eyeshadow onto the outer corner, crease and move it along to the side of the nose
*like in the picture* and of course, dont forget to apply highlight on the peak of the eyebrow.

STEP 3.
Apply a bronze gold color on the eyelids and blend it well with the purple.

STEP 4.
To intensify the makeup, I added a dark maroon with a tint of red along the side of the nose.
STEP 5.
Add the same highlight color on the inner corner of the eyes, make sure everything is blended well.

STEP 6.
Then add a gold eyeshadow in the middle of the eyelids.

STEP 7.
Apply the same purple eyeshadow on the bottom lash line, and take some gold eyeshadow,
apply it below the purple line, blend it well!

STEP 8.
Add a gorgeous pair of lashes and of course, underline the waterline.

STEP 9.
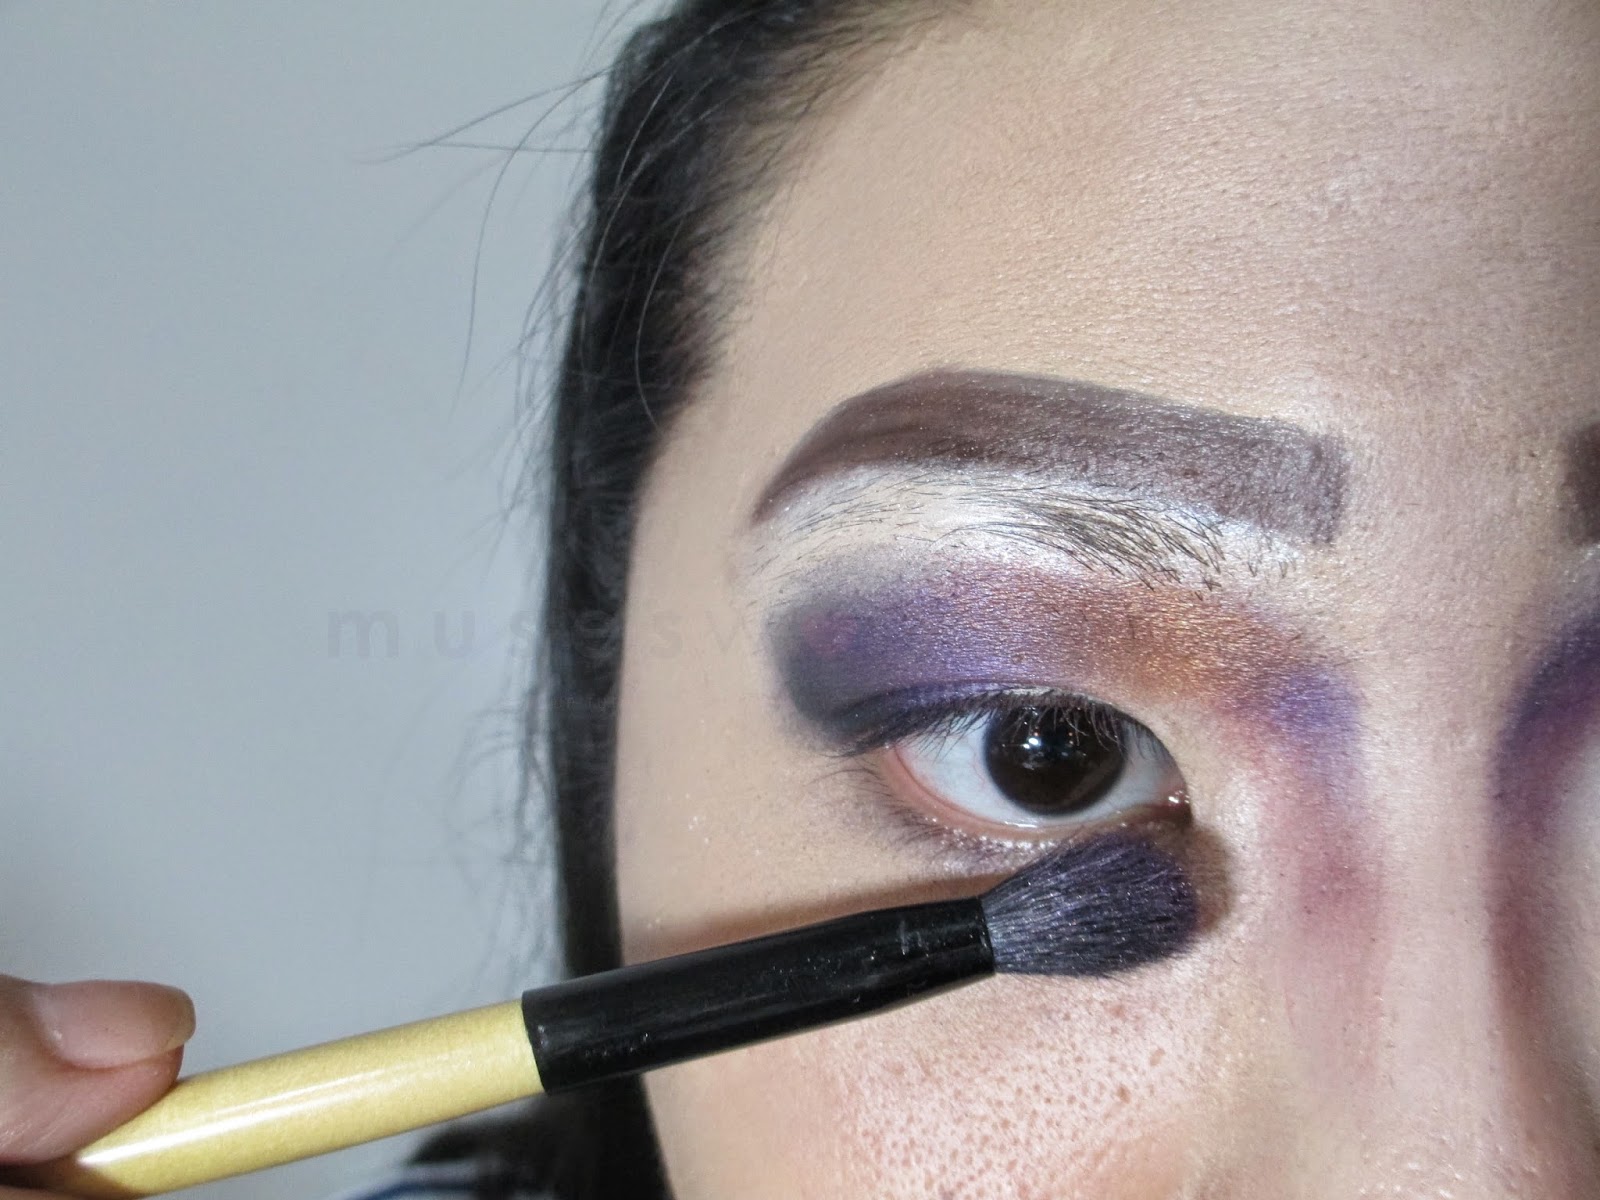
Add a strong shading, this means, keep on adding until it is obvious.

STEP 10.
There are a lot of choices in how to do the lips, I decided to go for this one :P
I never done this type of lips before so, add a lipstick onto the lips normally, choose any colors of your choice, then with a darker color lipstick pencil, outline the whole lips.

And here is the final look!
This is the eyebrow before the editing.


make sure to find me at:
twitter: @museswonderland
instagram @museswonderland
like my FB page: Muses Wonderland
Youtube channel: Muses Wonderland
5 comments:
pose yang mengundang itu dimana gyy?
Waaa.. Kukunya bikin tambah nge-"Drag Queen"...
yeee neh cewe2 hahah kalian kesemsem ma poto mengundangkuh yaaaaa hahahaha udah eke pajang kokkkk hahahah
foto blow kiss nya ce feegie bener bener kereen.. ditambah kuku makin manteeeppp cee ^^
cakepp..suka ama gradasi warna eyeshadow nya!
Post a Comment